
In the last couple of months my colleagues and I struggled with mobile presentations. We had always two situations/ problems. Either we showed our apps during the sprint review meeting just to the client on the real device and all others could not see what we were presenting. Or we were fighting with HDMI/ VGA cables to connect the device to the projector, but we never get the perfect setup up and runing, so that everyone in the meeting was happy. So we thought about a mobile cam holder for the presentations, where the app is presented on the real device. The installed web cam should be connected to a laptop and the interactions from the device are visible on the projector.
The whole team agreed, that we need such a cam holder. We checked the internet for cam holders to buy, but the solutions we found are really expensive and not what we wanted. So the next logical step was to build our own cam holder.
I volunteered to build the cam holder at the weekend. Before I started with building the cam holder I made a construction plan. Then I thought about the material, and decided to use wood. It is easy to work with and it looks good.
After my trip to the hardware store I came back with the following stuff and payed around 20€ for it:
- A saw
- A clamp
- Wood glue
- Abrasive paper
- Two wood strips with a groove 100cm x 1,5cm x 1,5cm
- And another more wider and thinner wood strip 100cm x 4cm x 0,5cm
See the stuff on the following picture.

Besides the stuff from the hardware store you need a webcam. In the team we decided to buy the Microsoft Life cam studio web cam.
The camera has a diameter of 3 cm and will fit perfect in the construction plan. For more information about the camera, check the specifications on the microsoft page. Another plus to choose this camera is that Heiko Behrens developed a Mac OSX software to use the camera together with a cam holder. You can download the software from here.
After my planning session I came up with the detailed plan.

In the following two pictures you can see the plan with all angles and dimensions. The first image shows the cam holder from the side.

The next picture shows the cam holder from above. In the middle of this picture you see the hole for the webcam. Depending on your camera this hole is smaller or bigger.

If you are finished with the whole cutting, grinding and gluing you will have the following parts:
- Two side parts glued together
- Two small wood slices 4x8cm to connect the side parts
- And one piece of wood 4x8cm for the camera (the one with the hole)
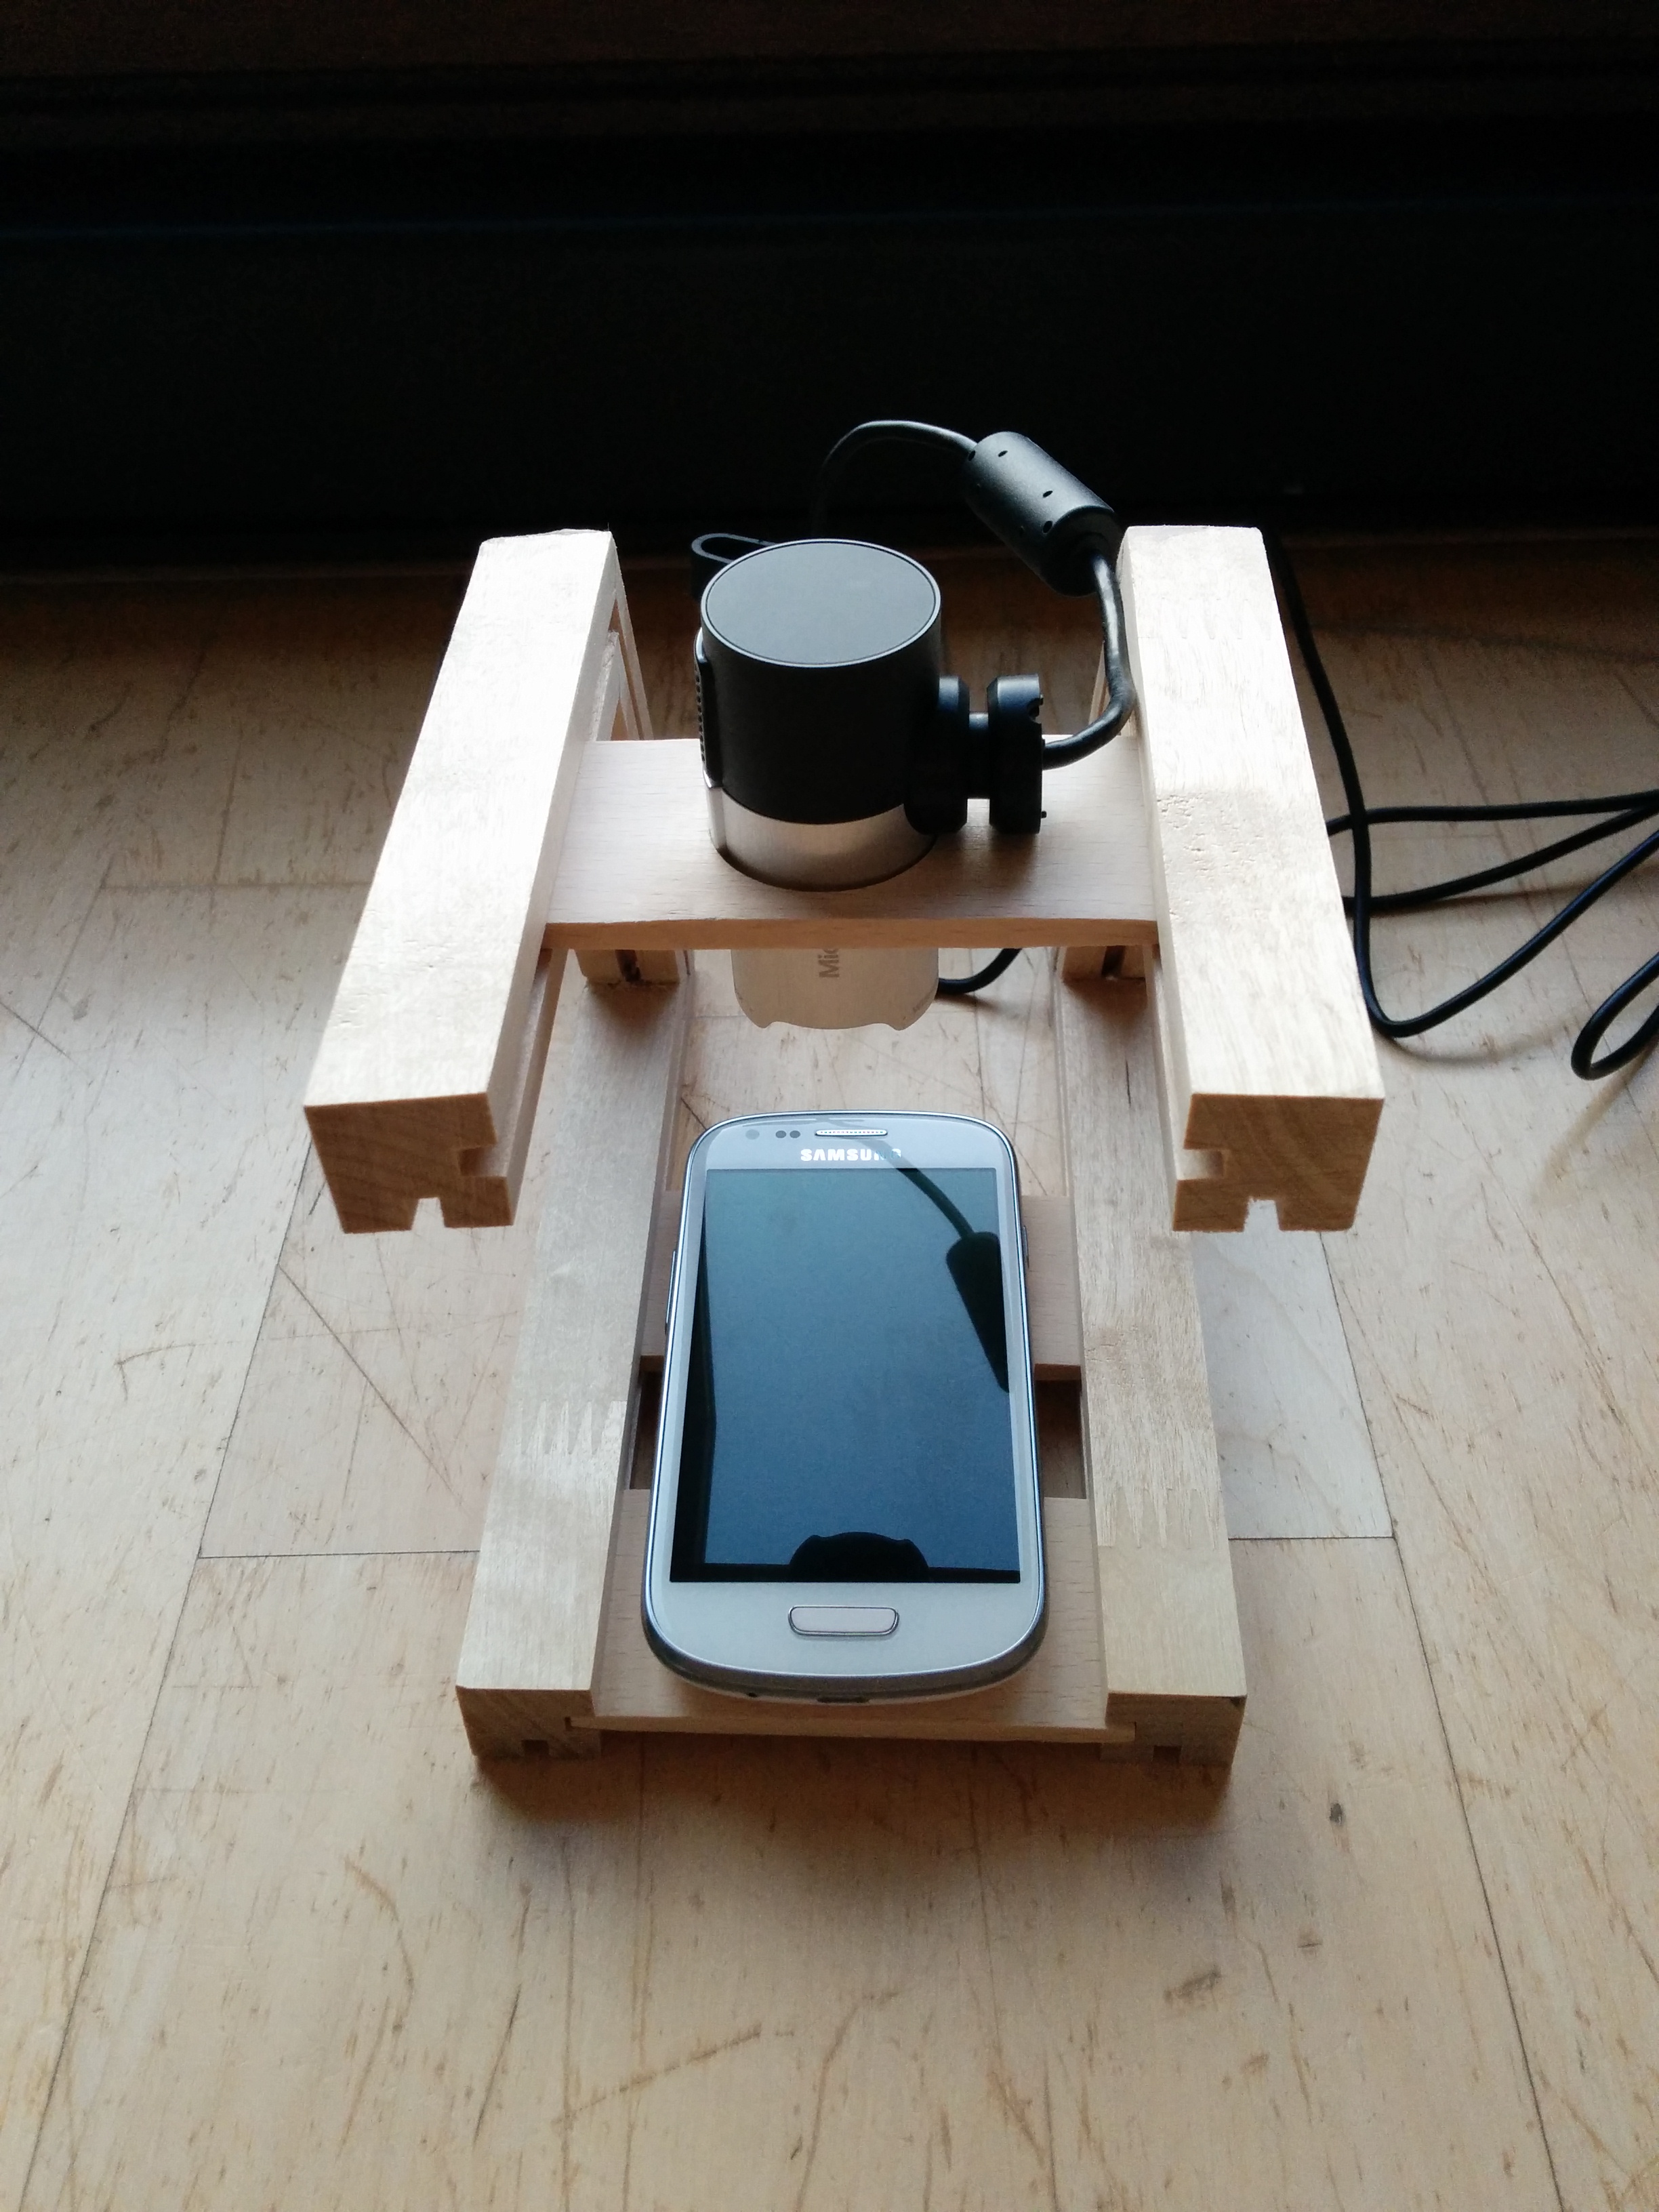
 If every part is attached to each other the cam holder should look like this (Pictures where taken before the hole was drilled and with 2 wood slices for the camera).
Side view:

Front view:

Front view with device:

In the next step you need to drill the hole for the camera. You should use the following 3 cm drill.

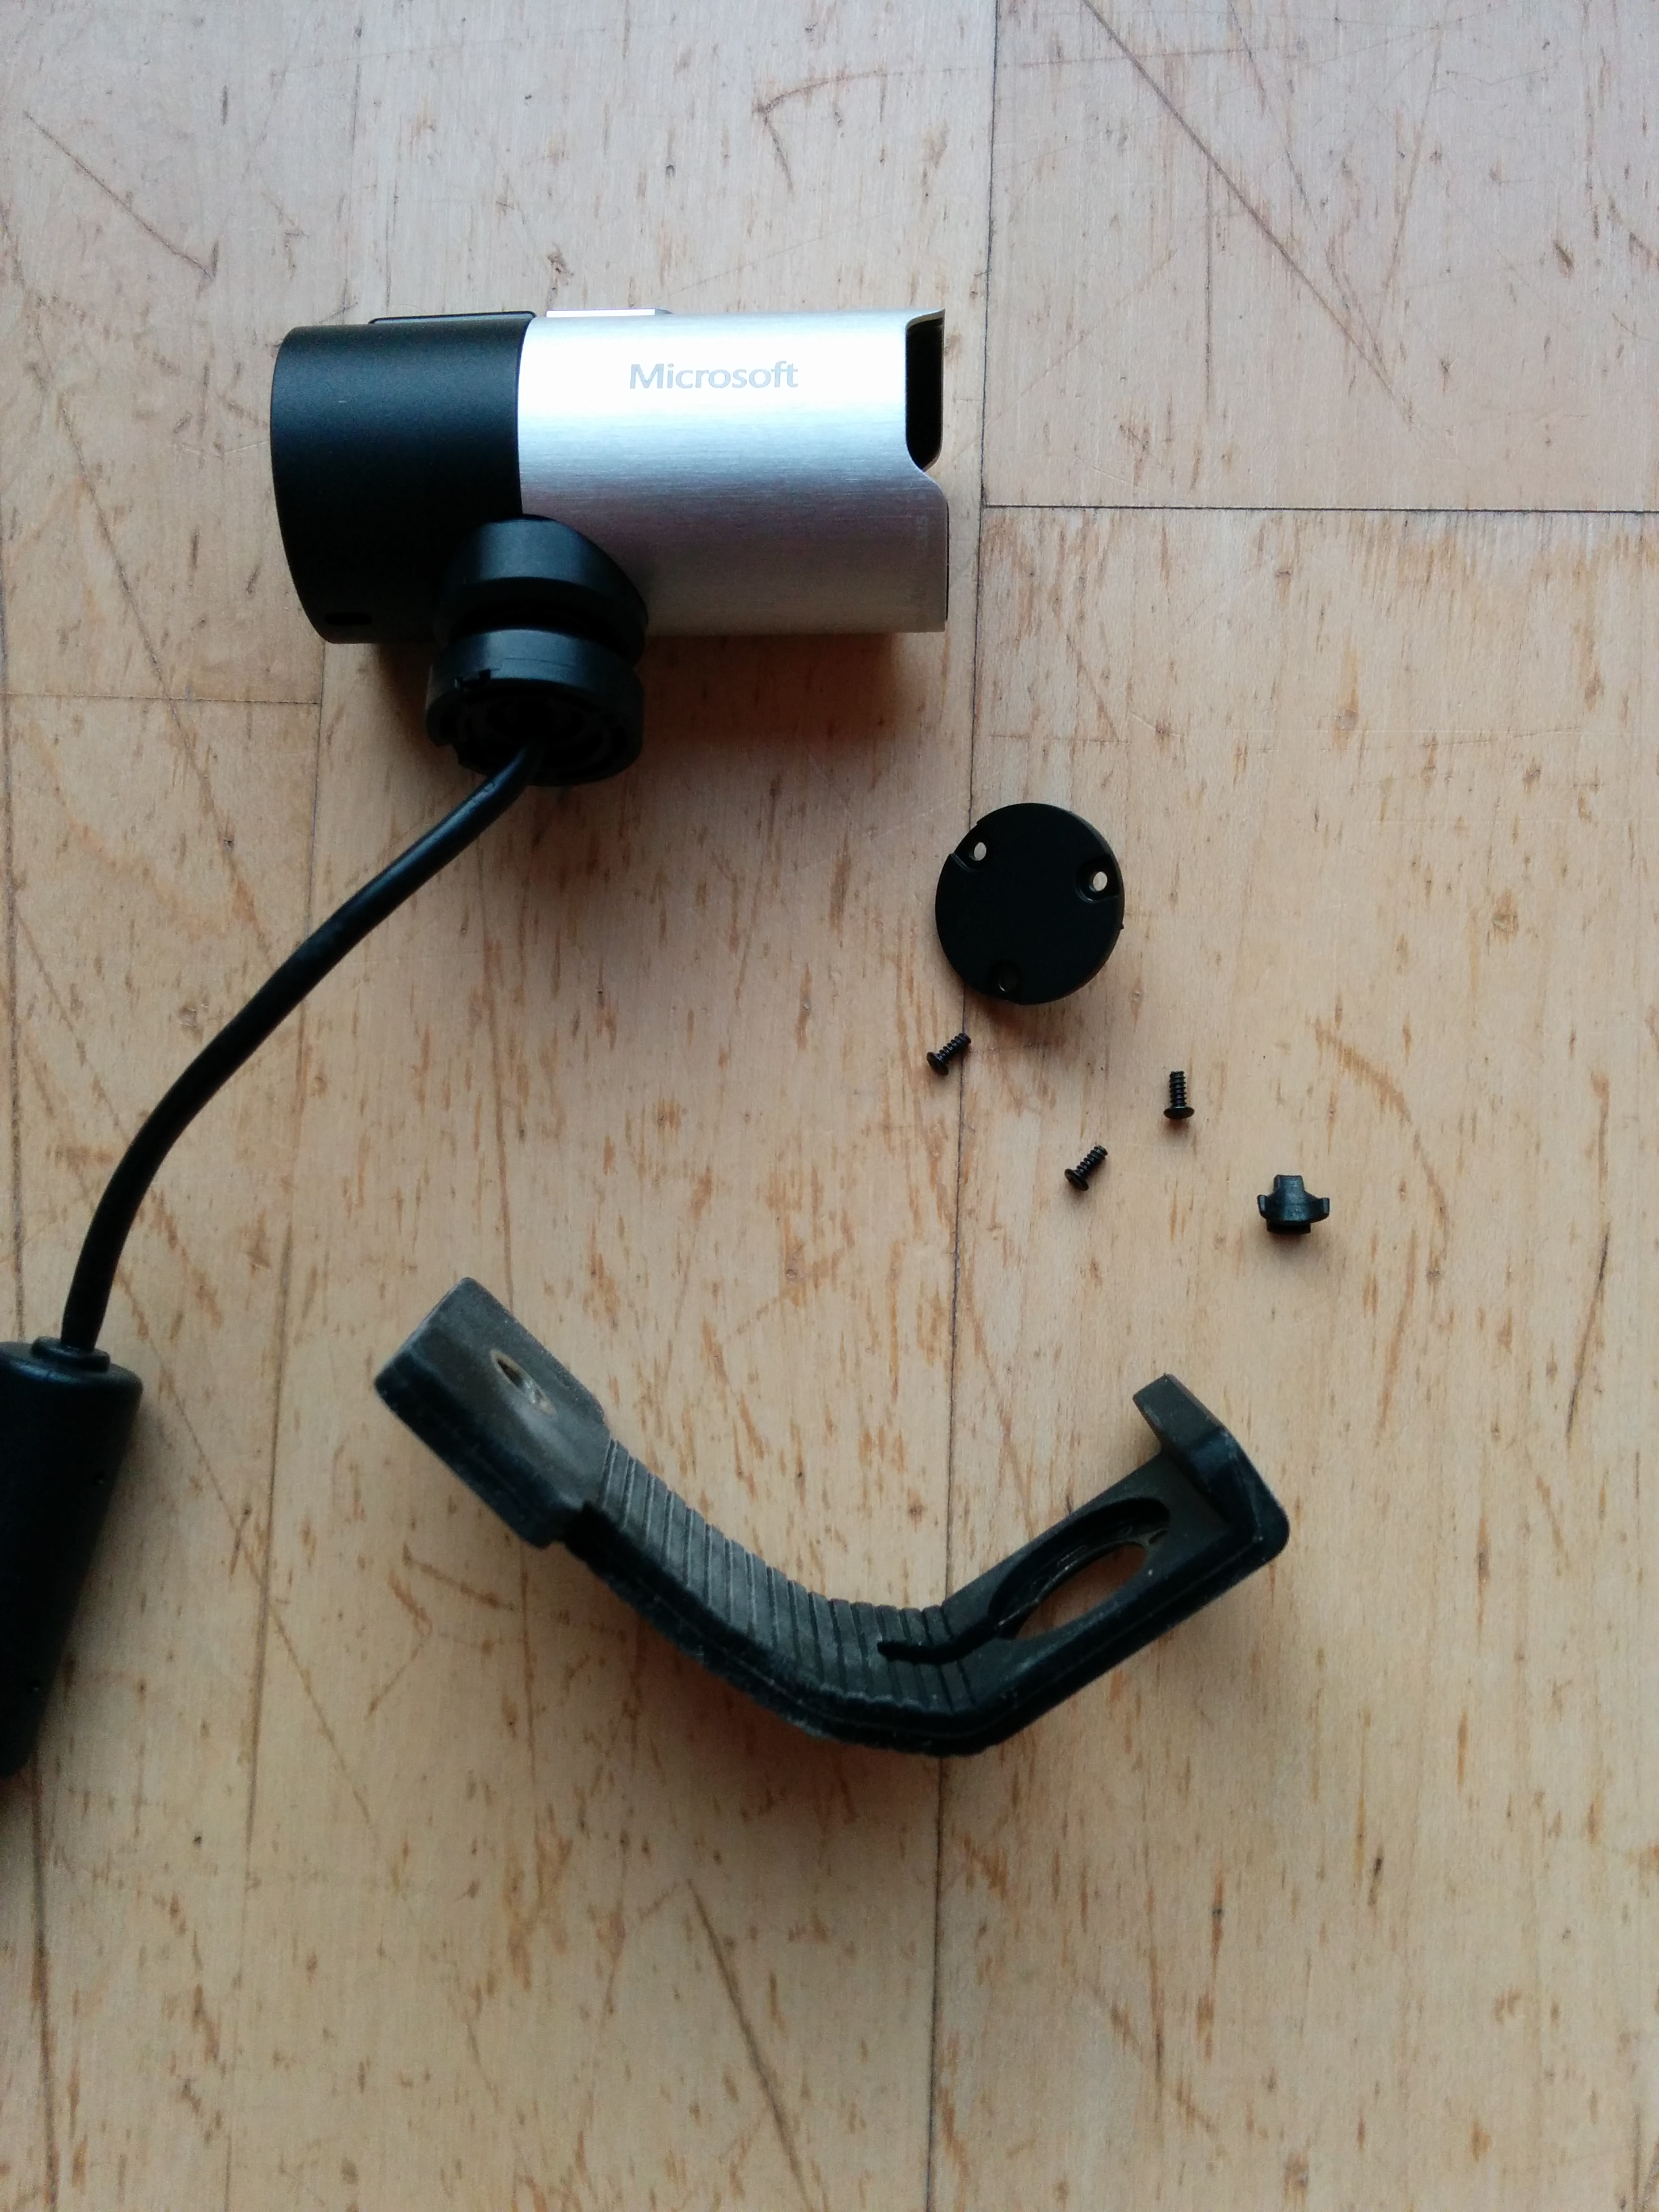
If you also buy the Microsoft Life Cam Studio web cam, you can remove the elastic holder for monitors. Just remove the 3 little screws.
To be sure that the device is attached safely, I added a nano pad (~5€) to the lower wood slices.

If everything is connected the, complete cam holder should look like this:
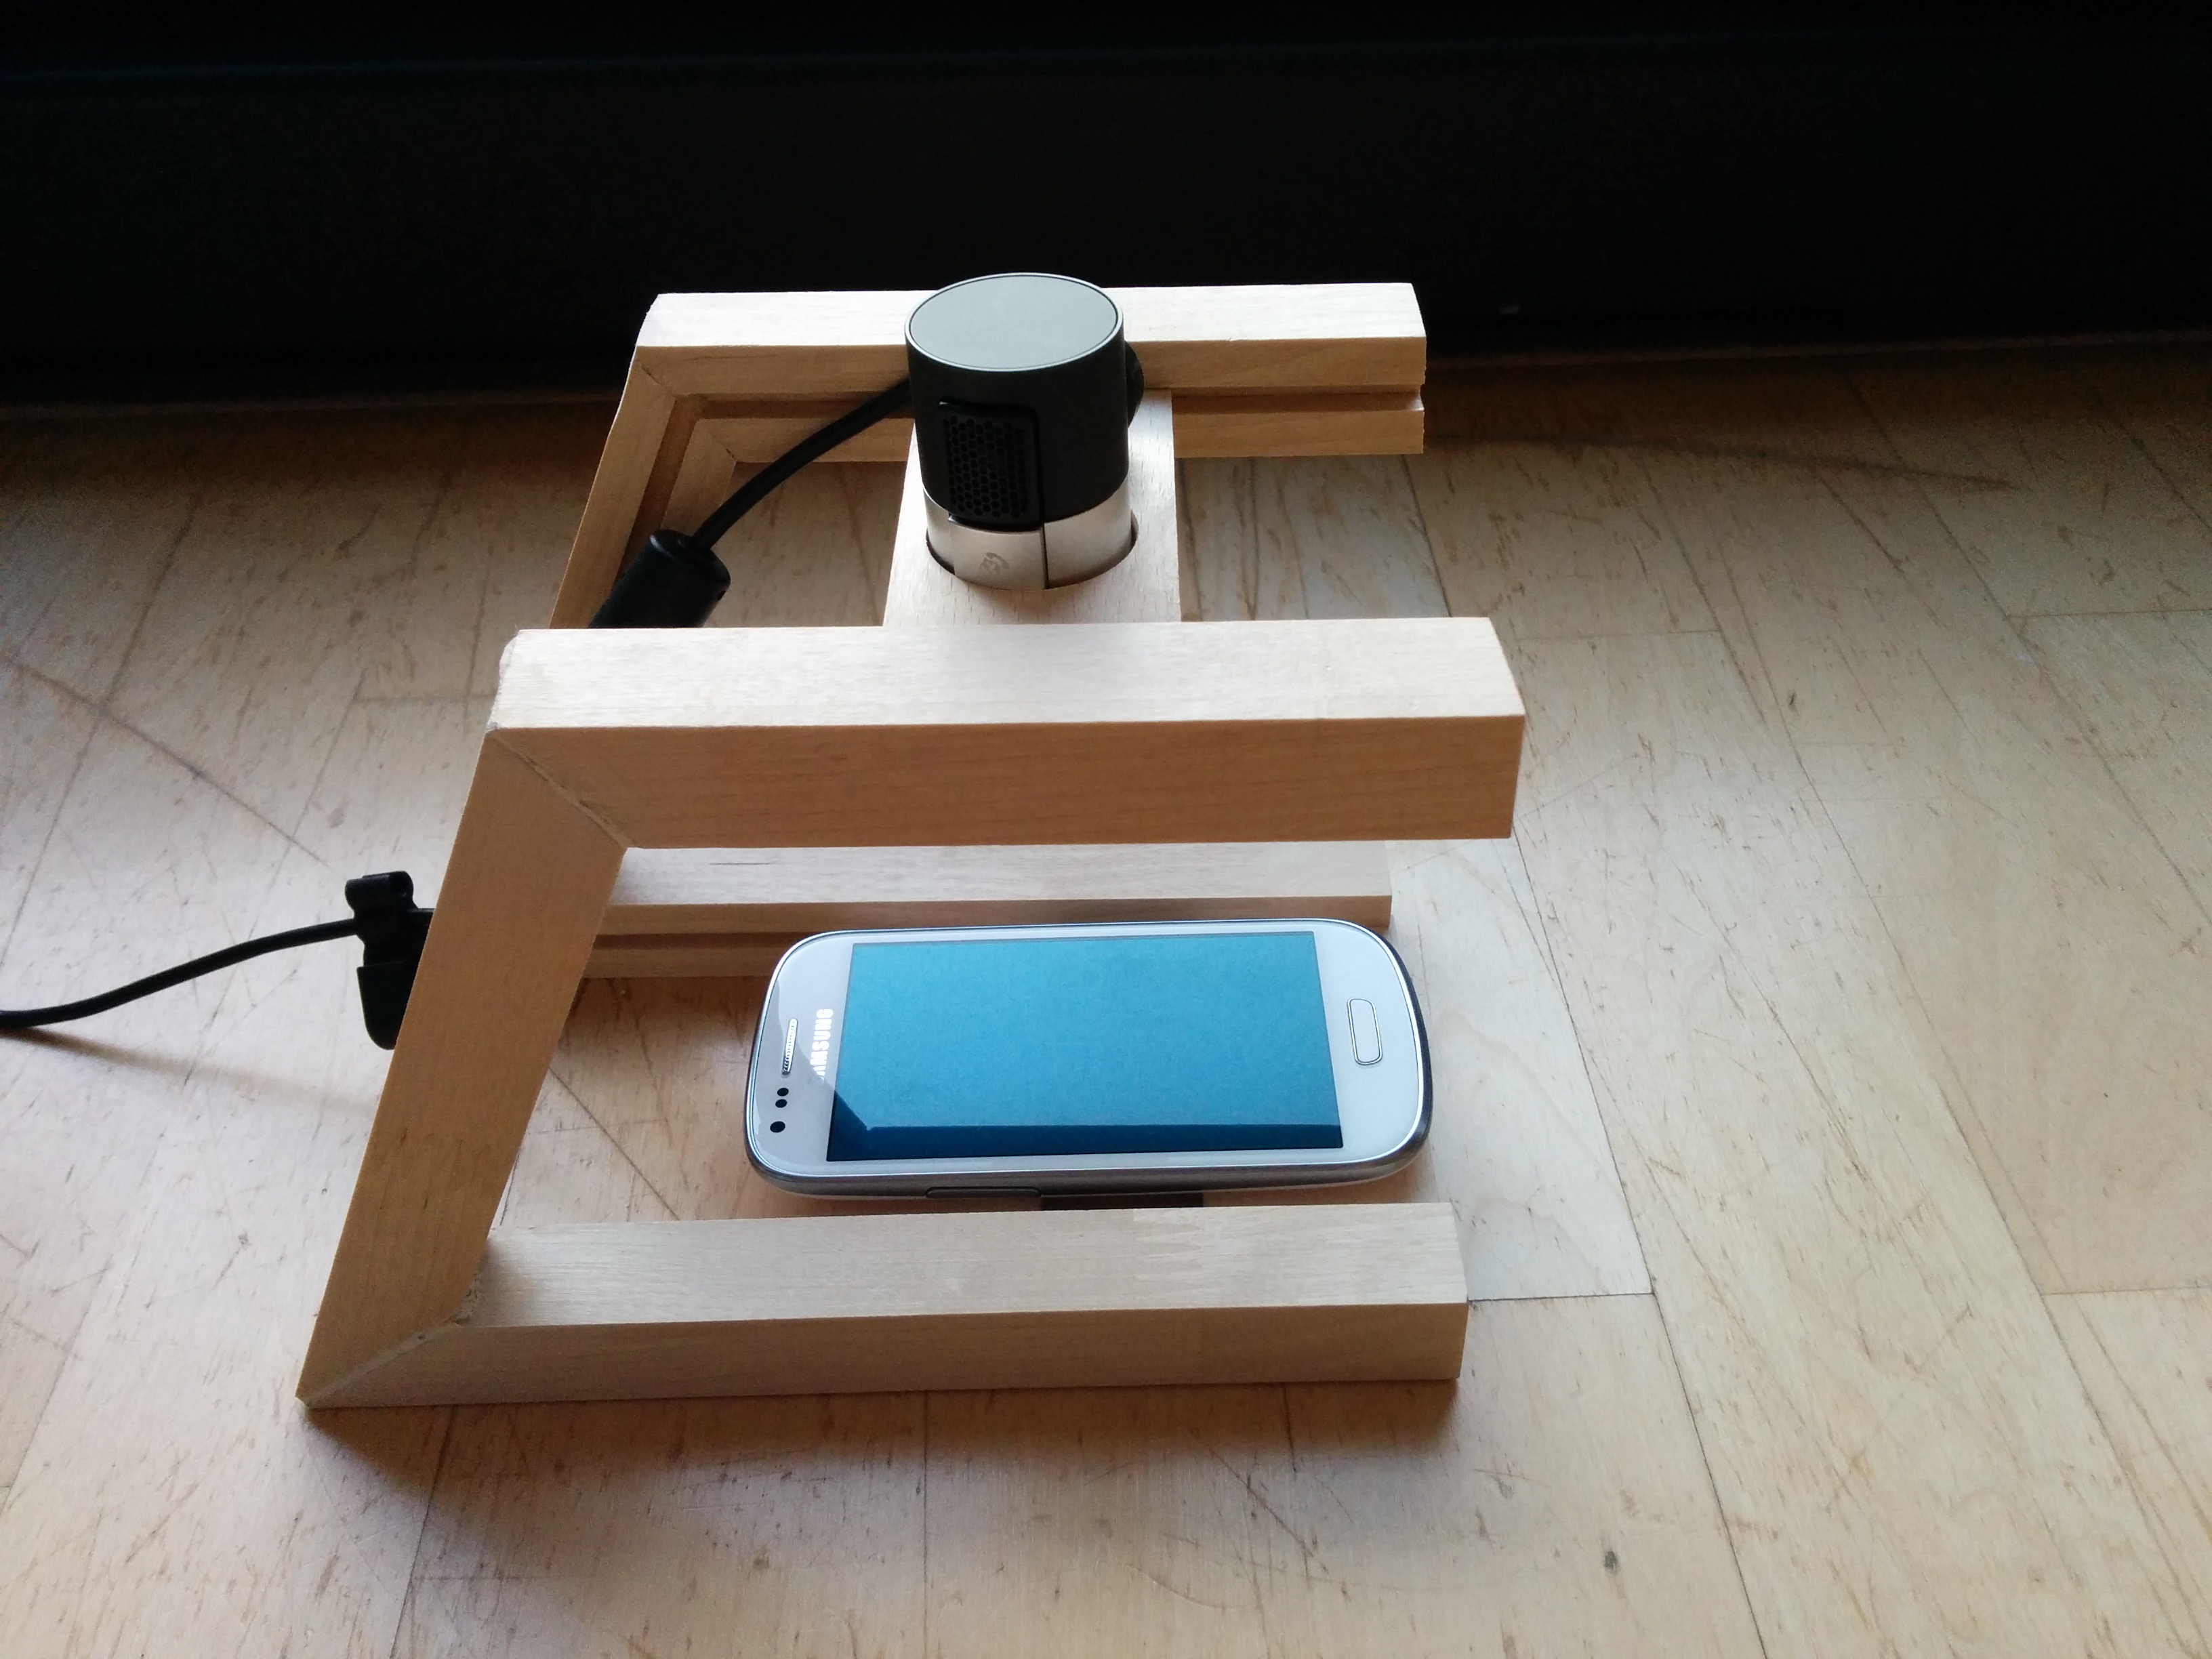
You can now decide whether you want to glue all parts together or to have the possibility to detach the cam holder for better portability. I decided to glue every part together and leave the cam holder in the office for better stability.
At the end the whole project took me around 10 hours to construct, cut, grind, glue and attach every part together (Glue drying time not included). It was really fun to work with the wood and to see the finished product at the end, even if the cam holder is not perfect, but hey its handmade ;). I am really looking forward to my first presentation with the cam holder.
I hope you like my plan and the cam holder design :). Looking forward to get feedback from you and maybe you will build your own. If you build your own cam holder, send me a picture and I will add it to this post.
Happy building!
By Daniel Knott